You too can Create your Very Own Digital Characters
eaturing in this months who’s who wasn’t enough, Luke Feldman generously made The Graphic Design students a tutorial using his funky design style and one of his quirky characters. See how Luke transforms a sketch into a vector character.
{{figure:}}
 {{:figure}}
Author: Luke Feldman
Luke Feldman is an Australian multimedia designer who has written tutorials on Illustrator, Photoshop, Flash and After Effects for various international magazines and websites.
Luke is the creator of Scaffs, a world of bizarre and vibrantly colored characters. You can also check out the interview with Luke here.
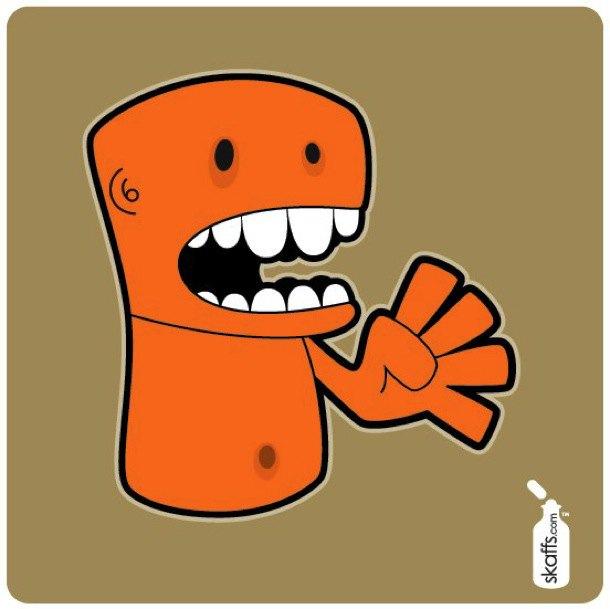
Final Image Preview
You too can create your very own digital characters!
Step 1:
Hone in on your doodling skills, as we are going to transform your character into a cool digital character! Scan in your character design into the computer. I use Photoshop and then save it as a *.jpg file.
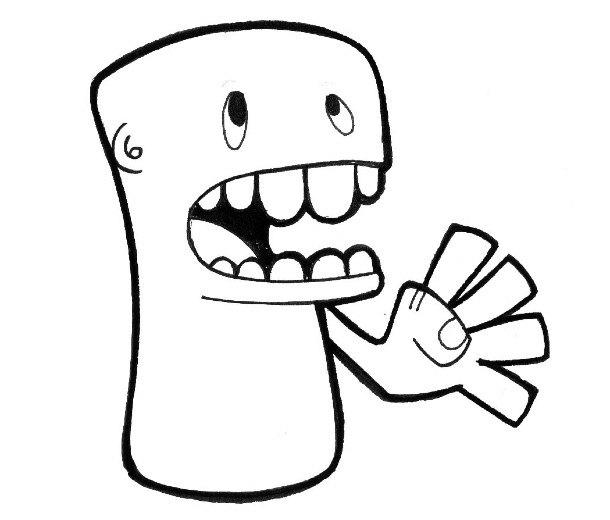
For reference, I have included this image as well as the finished illustrator file (Illustrator CS2). (Note: I used Illustrator CS4 for this tutorial, but the process is the same for other versions)
Step 2:
When beginning a job you need to have a clear idea of what your target format is i.e. will it be used for print or web? A print design would be saved either as CMYK or RGB and at 250dpi or higher. A design for the web would be saved as RGB and at 72-75dpi for screen.
Step 3:
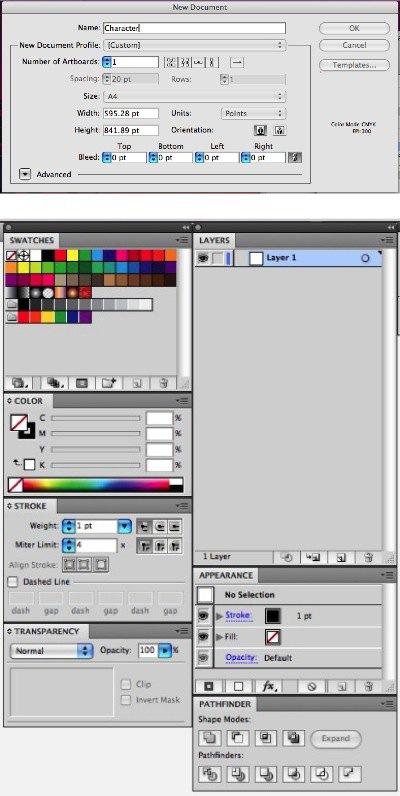
Create new document in Illustrator File>New. Keep in mind that this final illustration will be used for print so I will be creating a file with CMYK colors and at 300dpi.
For this Tutorial make sure that you have the following panels open (All can be accessed via the Window menu):
- Layers Panel
- Stroke Panel
- Color Panel
- Appearance Panel
- Pathfinder Panel
Step 4:
Import the image into Illustrator File > Place. Name this Layer ‘Sketch’. This can be done by double-clicking on the actual layer name.
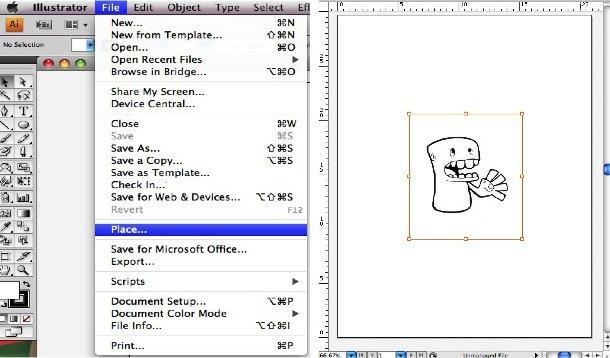
Step 5:
Select the image and set image transparency to 30%. I chose a 30% transparency because I want to be able to use this image as an overlay and Trace behind it. Now lock the layer – this can be done by going to the Layers Panel and selecting the check box next to the Eye icon.
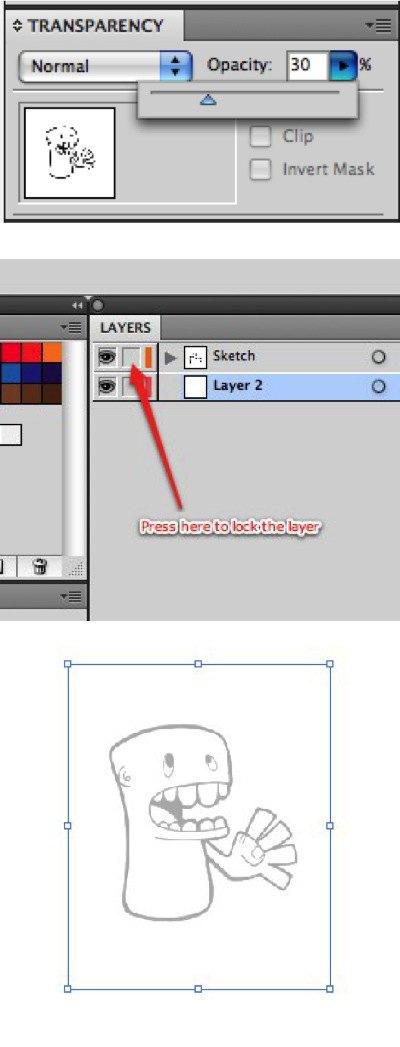
Step 6:
Create new layer by using the drop-down menu on the top-right of the Layers Panel select New Layer and name it ‘Artwork’. The shortcut for this is “Command-L” for Mac or “Ctrl-L” for PC.
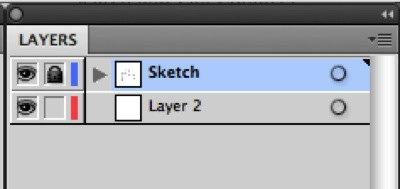
Step 7:
Select the Pen Tool and using the Stroke Panel, set the Stroke weight to 1, and the Color to Black C:100 M:100 Y: 100 K: 100. The stroke weight refers to the thickness of the ‘line’. Begin to draw basic outline of character on ‘Artwork’ layer in this order:
- Body
- Head
- Arm
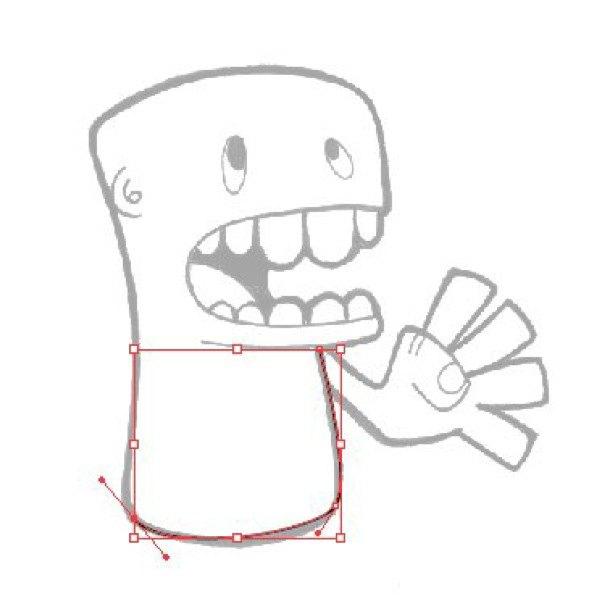
Step 8:
Continue drawing the outline of character. When drawing the outline of the thumb make sure that the path isn’t closed i.e. don’t connect
- Thumb
- Ear and Eyes – I created the eyes using the Ellipse Tool
- Teeth and mouth
I choose this order because when designing a character I like to get the characters main body shape right first and then go back and add the details.
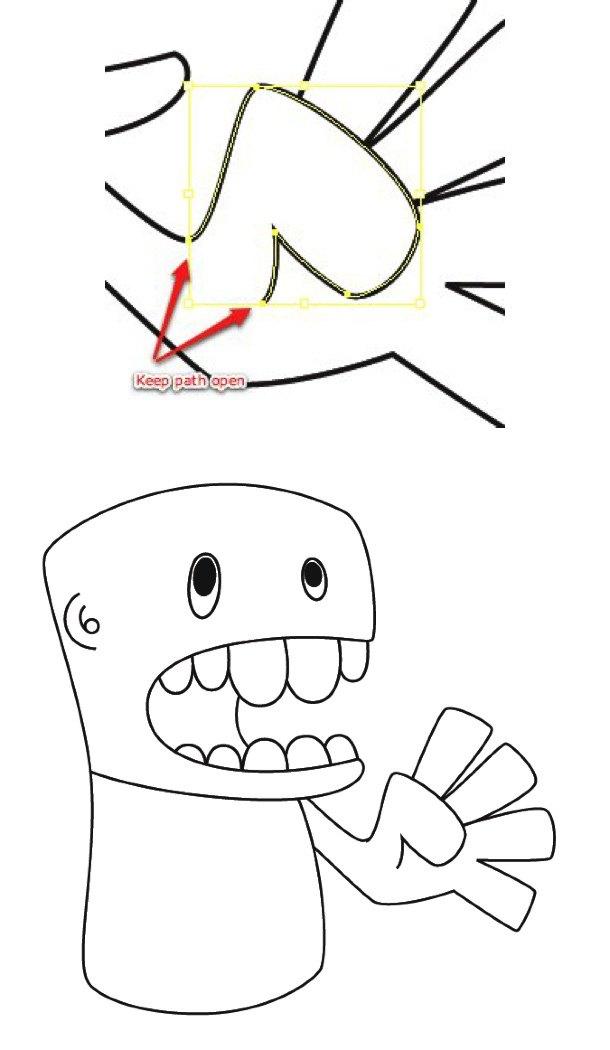
Step 9:
Create a new Layer (“Command-L” for Mac or “Ctrl-L” for PC) and name it ‘Background’. Next create a simple box using the Rounded Rectangle Tool on this layer with a Fill color of C:30 M:30 Y: 60 K: 0. Once you have finished, lock this layer so you don’t accidentally select it.
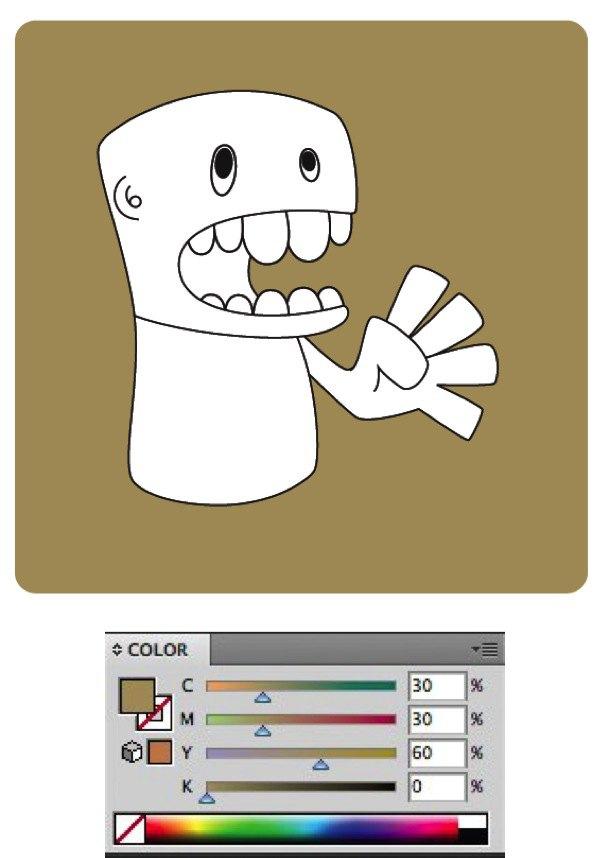
Step 10:
Now we are going to add some color. I want to create a new orange color, so using the Color Panel insert the values of C:0 M:50: Y:100: K:0. Then using the drop-down menu on the top-right of the Color Panel select Create New Swatch. This adds the new color to the Swatch Panel.
Reselect the ‘Artwork’ layer and color the characters body, head and arms with the new orange color. I also darkened the orange slightly around the eye C:0 M:50: Y:100: K:10.
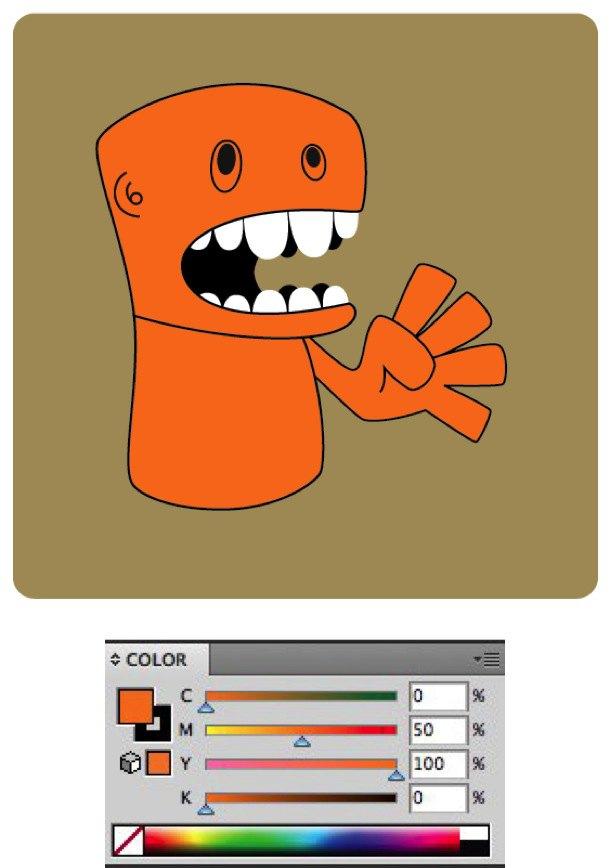
Step 11:
Add a belly button that is made up of 2 circles using the Ellipse Tool. The inner ellipse is colored C:0 M:50: Y:100: K:10 and the outer ellipse is colored C:0 M:50: Y:100: K:10
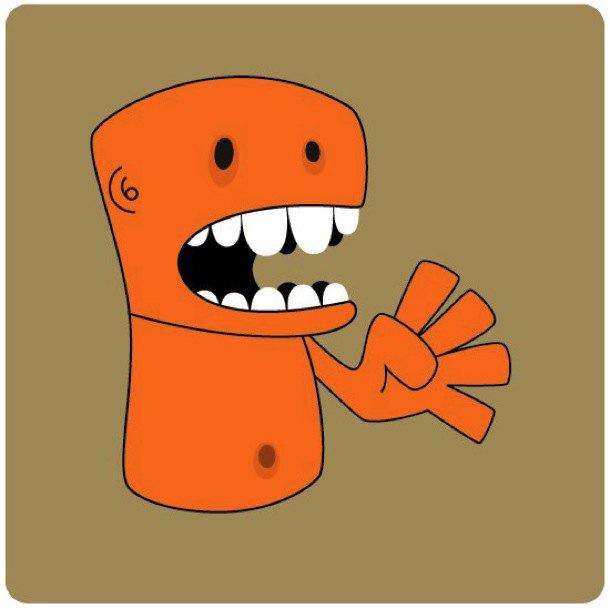
Step 12:
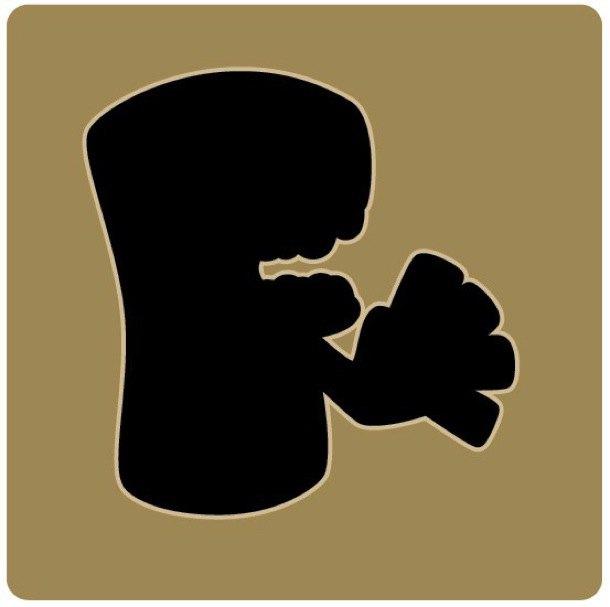
Here I want to create a coloured border for the character. Reselect the ‘Artwork’ layer and select all of the elements that you want the border to be around i.e. the head, body, arm thumb, teeth and mouth. Copy these objects (“Command-C” for Mac or “Ctrl-C” for PC).
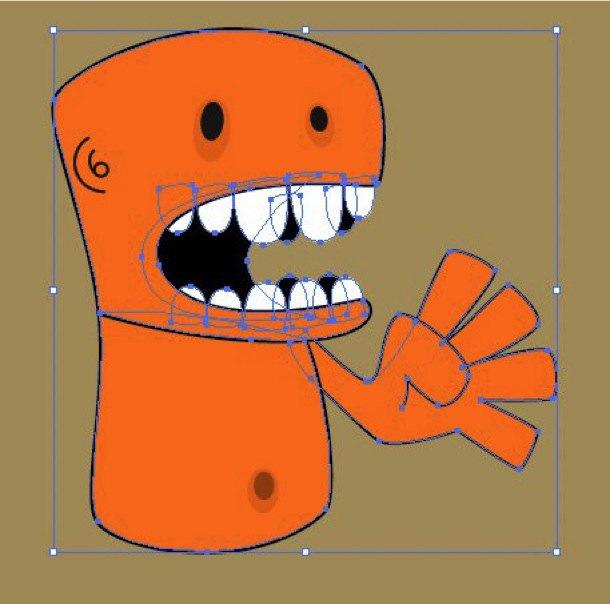
Step 13:
Create a new Layer and call it ‘Border’. With the ‘Border’ layer selected paste these objects using Edit>Paste in Front (“Command-F” for Mac or “Ctrl-F” for PC) to the new layer. The Paste in Front command pastes the objects in exactly the same position in front of the currently selected object. Turn off the ‘Artwork’ layer so that you can see what you are selecting on the ‘Border’ layer.
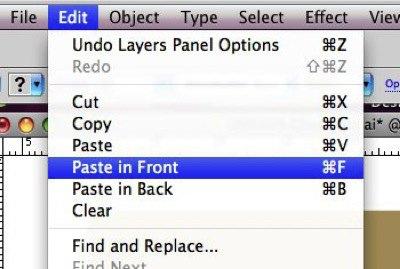
Step 14:
With the ‘Border’ objects selected go to the Appearance Panel. Using the drop-down menu on the top-right of the Appearance Panel and press Clear appearance - this makes sure that all outlines or effects are removed. I find that clearing the appearance of objects that are going to be merged/combined with the Pathfinder Tool, reduces the chance of strange errors with the objects. With these objects still selected, give them a fill of Black C:100 M:100 Y: 100 K: 100.
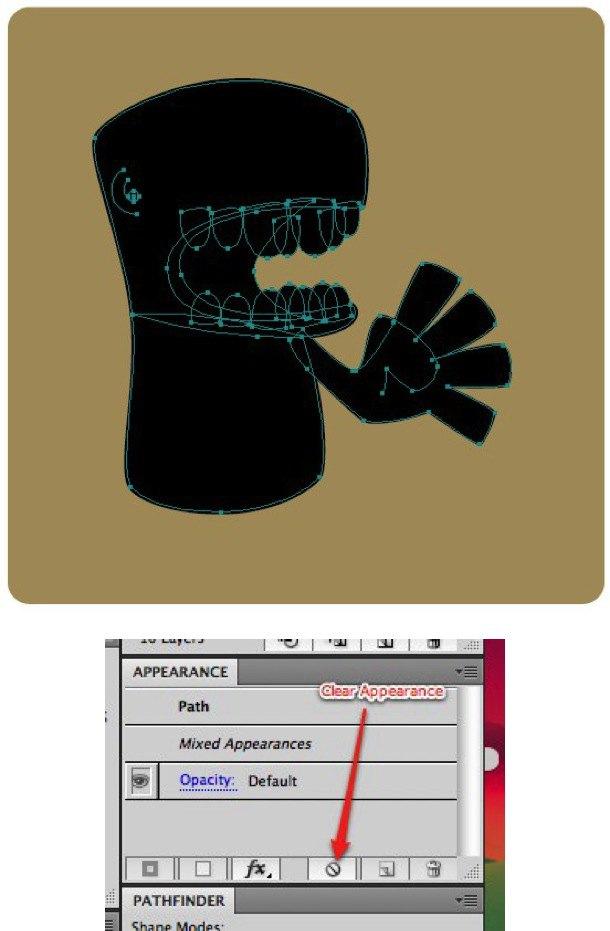
Step 15:
With the objects still selected go to the Pathfinder Panel and select Merge – this merges all of the objects into one complete object. Add a Stroke to this object and add a weight of 6, colored Black C:100 M:100 Y: 100 K: 100.
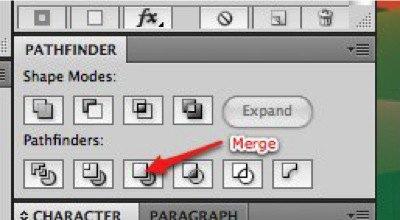
Step 16:
Copy this object and paste it using Edit>Paste in Back (“Command-B” for Mac or “Ctrl-B” for PC) to the new layer. The Paste in Back command pastes the objects in exactly the same position behind the currently selected object. Change the Fill and Stroke color to C:15 M:15 Y: 30 K: 0. Change the Stroke weight to 10.
Step 17:
These techniques can be used to utilized to create lot of different styles for example graffiti, retro or comic book designs. I also highly recommend experimenting with the Pathfinder Panel as this can be used to create some really cool stenciling effects.

by